
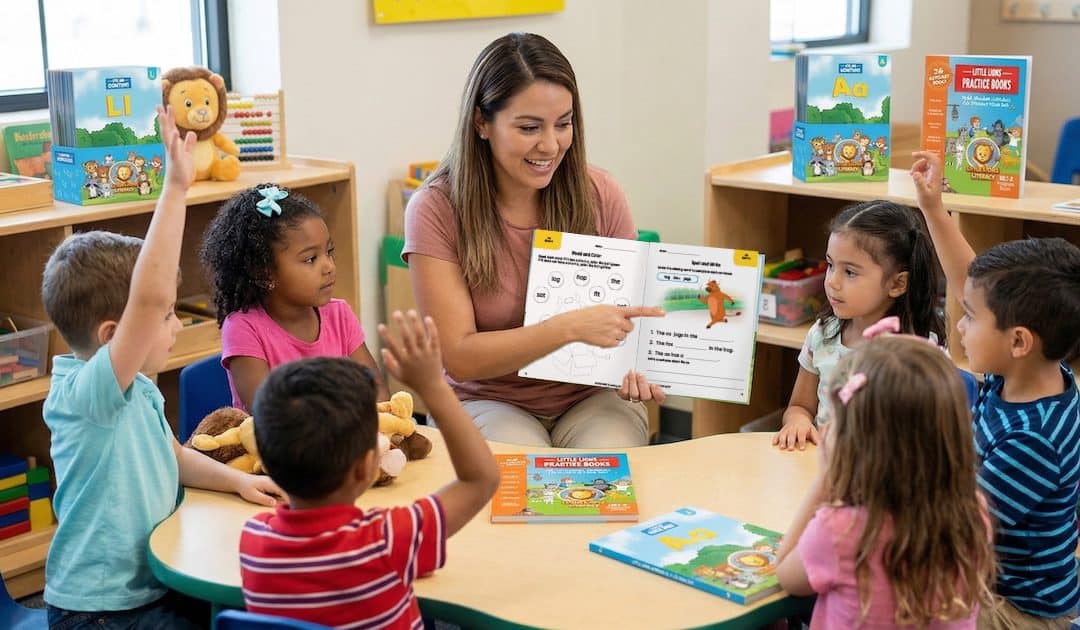
Frustration often builds when a child struggles to connect letters with their sounds during nightly reading practice. Many parents feel stuck using old methods that do not work for every learner. Starting multisensory reading activities can turn these hard times into fun games for your child.
Multisensory reading activities are teaching tools that use sight, sound, touch, and movement at the same time to build skills. This way of learning is backed by brain science research showing that using many senses together helps the brain form strong links for reading. Instead of just looking at a book, your child might trace letters in sand or tap their arm to blend sounds into words. These games create many paths in the mind, which makes it easier for struggling readers to find and use what they know. According to Savvas, these activities help kids process language well by linking sounds and letters. We share five fun and easy ways you can use these games at home right now.
You do not need special tools or a classroom to start using these methods in your own living room. Understanding the simple science behind this way of teaching will help you choose the best games for your child. Let us explore what multisensory reading activities are and dive into five fun activities you can try tonight.
What Are Multisensory Reading Activities?
Multisensory reading activities help children learn by using more than one sense at a time. This method involves sight, hearing, touch, and movement. When kids use many senses to learn a new skill, they build strong paths in the brain. This makes it easier for them to remember what they learn. Many parents use these tools to help children who show signs of reading difficulties at home.
How do multisensory tools work?
These activities work because they engage the brain in many ways. Most reading lessons only use sight and sound. But multisensory learning adds touch and body movement. This is often called VAKT. That stands for visual, auditory, kinesthetic, and tactile. Using VAKT helps your child connect letters to sounds in a way that sticks. The table below shows each sense and how it works.
| Sense | Type | Example Activity |
|---|---|---|
| Sight | Visual | Seeing letter cards and word tiles |
| Hearing | Auditory | Saying letter sounds aloud |
| Movement | Kinesthetic | Tapping arm or swatting picture cards |
| Touch | Tactile | Tracing letters in sand or shaving cream |
Research shows that engaging multiple senses strengthens the neural connections in a child’s brain.
The Orton-Gillingham approach
The Orton-Gillingham approach is a well-known way of teaching that uses these steps. It was made to help kids who struggle with reading or have dyslexia. It breaks reading down into small steps that build on each other. The International Dyslexia Association says that this type of teaching works well for all students. It is a core part of how we teach children to read with success.
Simple tools for home use
You do not need to buy costly kits or gear to start these activities. Most things you need are already in your house. You can use common items like letter tiles, sand, or even shaving cream to make lessons fun. The goal is to make learning feel like play. Using simple household items makes it easy to fit 10 or 15 minutes of practice into your day without any stress.
Fun Activity #1: Squish the Syllables
Syllable awareness is a vital part of learning to read. It helps kids break long words into small, easy parts. The Squish the Syllables game uses a physical move to teach this skill. It is one of many multisensory reading activities that make school feel like play. This game is great for kids who struggle to hear the beats in words.
What You Will Need
You do not need fancy tools for this. A simple stress ball or any soft, squishy ball will work. If you do not have a ball, you can use a piece of play dough or a big sponge. The goal is to give your child a thing they can squeeze hard with their hand.
How to Play
- Pick a word and say it clearly to your child. Start with short words and move to long ones as they get better.
- Ask your child to say the word back to you while they hold the squishy ball in their hand.
- Have your child squish the ball once for every syllable they hear in the word.
- For the word “cat,” your child gives one firm squish. For “butterfly,” they give three quick squishes.
- Count the squishes together to see how many parts are in the word.
- Try long words like “watermelon” or “alligator” to test them with four squishes.
Why It Works
This game works because it uses the sense of touch. When a child squishes the ball, they feel the muscles in their hand work. This move helps lock the sound of the word part into their brain. Research shows that engaging multiple senses during a lesson helps build brain links. It turns a sound into a thing they can feel.
How to Change the Game
For young kids, use words that are easy to see. Focus on things they see each day, like “apple” or “wagon.” If your child is older, use big words from their favorite books. You can also have them close their eyes while they squish. This forces them to focus just on the sounds they hear. Helping a child with signs of reading difficulties often starts with these easy, hands-on games.
Fun Activity #2: Read It, Build It, Write It
The Read It, Build It, Write It task is a core part of many multisensory reading activities. It helps kids learn new words by using their eyes, hands, and voices all at once. This method is simple to set up at home and only needs a few basic items. You will need some cards, a set of letter tiles or magnets, and a piece of paper with a pencil.
How to set up the game
To start, write one word on each card. You should pick words that match where your child is now. For new readers, choose short words with three letters like cat, sun, or big. Place the card in front of your child and ask them to read the word out loud. This first step helps them see the word and hear the sounds at the same time.
Next, have your child build the word using tiles or magnets. They must find the right letters and put them in the correct order. This step adds a touch part as they move the pieces with their hands. Last, ask your child to write the word on their paper. Writing the letters helps fix the word in their mind. This three-step loop makes learning feel like a game rather than work.
Why this task works
This task works because it uses four ways to learn. These are sight, sound, touch, and movement. When kids use many ways at once, they build strong links in their brains. This makes it easier for them to remember how to spell and read new words. It is a key part of the Orton-Gillingham approach used by experts to help kids read.
Research from the National Institute of Child Health and Human Development shows that this type of teaching is helpful. It is great for kids who struggle with reading or have dyslexia. The PRIDE Reading Program uses this way to teach and holds a top rank from the International Dyslexia Association. By touching the letters and writing them out, kids get the extra help they need to win.
Ways to change the game
You can change this task as your child grows. Once they know simple three-letter words, you can add harder words. Try using words with sound blends like trap or fast. You can also use words with silent letters or long vowel sounds. The goal is to keep the tasks hard but not so hard that your child wants to quit.
For older kids, you can even use this method to learn sight words or big spelling words. You might use bright tiles or new tools like chalk to keep them happy. No matter the level, the core steps stay the same. Reading, building, and writing together create a solid base for strong reading skills. It is a tool that you can use for years as your child learns.
Fun Activity #3: Swat the Sound
Swat the Sound is a high-energy game that turns phonics practice into a physical challenge. This activity helps children find the sounds they hear in words by using a fly swatter to hit picture cards. By adding big body movements, you help your child build strong links between sounds and images.
How to set up Swat the Sound
To start, you will need a clean fly swatter and a set of picture cards. You can use cards from the PRIDE Reading Program or draw your own on index cards. Place three to five cards on a table or tape them to a wall at your child’s eye level. Make sure the cards show simple objects like a dog, a cat, or a sun.
Choose one sound to focus on before you begin the game. You might work on the sound at the start of a word or the sound at the very end. Research shows that this type of multisensory reading activity helps children process language better by using sight, sound, and touch at once. Give your child the swatter and explain that they will swat the card that matches the sound you say.
Playing the game at home
Call out a sound clearly, such as the /d/ sound. Your child should look at the cards and swat the dog picture as fast as they can. If you are working on ending sounds, say the /t/ sound and wait for them to swat the cat. This fast pace keeps kids on task and makes the learning feel like a fun race rather than a school chore.
You can also use this game to practice vowel sounds, which are often hard for kids with signs of reading difficulties. Spread out cards for “pin” and “pen” to help them hear the small difference between the /i/ and /e/ sounds. The physical act of swatting helps the brain map these sounds to the correct letters more quickly.
Why movement helps with reading
Adding big motor movement is a key part of the Orton-Gillingham method. When a child moves their whole arm to swat a card, it creates a “muscle memory” for that sound. This physical input is helpful for kids who find it hard to sit still during lessons. It turns a sit-down task into an active game that builds pride.
Most multisensory reading activities work best when they feel like play. Swat the Sound is a great choice because it is loud, fast, and fun. It takes the pressure off the reader and lets them focus on the joy of getting the right answer. Using simple tools like a fly swatter shows your child that learning can happen anywhere, not just in a book.
Fun Activity #4: Sand Tray Tracing
There is something deeply satisfying about tracing letters in a bed of soft sand. This simple activity transforms letter practice into a calming, sensory-rich experience that children often ask to repeat.
Materials: A shallow tray or baking sheet, fine sand or salt (colored sand adds extra appeal), and a flat surface.
How to do it: Pour a thin layer of sand into the tray – about a quarter-inch deep is perfect. Show your child a letter card or write a letter on a whiteboard. Have them trace the letter in the sand with their index finger while saying the letter name and sound aloud. For example: trace a “b” while saying “B says /b/.”
Encourage your child to make the letter large at first – about 3 to 4 inches tall – to engage their whole arm in the motion. As they gain confidence, they can make letters smaller, closer to the size they would write on paper.
Why it works: Sand tray tracing activates the tactile sense (feeling the sand) alongside the visual sense (seeing the letter form) and the auditory sense (hearing the sound). This triple engagement creates a stronger memory trace than writing with a pencil on paper alone. The slight resistance of the sand also adds proprioceptive input, which helps children with dysgraphia or fine motor delays.
Variations: Try shaving cream on a cookie sheet for a different texture experience. Use colored sand to make it more engaging. For children who resist writing, start with straight lines and circles before moving to letters. Some children love tracing letters with their eyes closed for an extra tactile challenge.
Fun Activity #5: Arm Tapping
Arm tapping is a classic Orton-Gillingham technique that requires zero preparation and zero materials. It is the ultimate grab-and-go reading activity for busy parents.
How to do it: Have your child hold out one arm, palm down, with their other hand ready to tap. Starting at the shoulder, they tap down their forearm for each sound in a word, ending at the wrist. Then they sweep their hand from shoulder to wrist while blending the sounds together into the word.
For the word “cat”: tap at the shoulder for /c/, tap mid-forearm for /a/, tap at the wrist for /t/. Then sweep the whole arm while saying “cat.” For “fish” (f-i-sh): three taps – /f/ at shoulder, /i/ mid-arm, /sh/ at wrist – then sweep and blend.
Why it works: Arm tapping reinforces left-to-right tracking, which is a foundational skill for reading English. Many struggling readers, especially those with dyslexia, have difficulty processing sounds in sequential order. The physical act of tapping from shoulder to wrist creates a reliable, repeatable sequence that the brain can anchor to. It also provides proprioceptive feedback that helps children feel the rhythm and segmentation of language.
When to use it: Arm tapping is perfect as a warm-up before reading, during transitions (waiting in line, riding in the car), or whenever you have two minutes. Because it requires no materials, it is the easiest multisensory reading activity to build into your daily routine. Start with 2-3 phoneme words and progress to longer words as your child gains confidence.
How to Make Multisensory Reading a Daily Habit
The best reading instruction is the kind that happens consistently. Here is how to weave multisensory reading activities into your family’s daily rhythm without adding stress to your schedule.
Start small. Just 10 to 15 minutes of focused multisensory practice each day can produce meaningful progress. Set a timer and commit to one activity per session. Short, frequent sessions are far more effective than long, infrequent ones.
Rotate activities. Children thrive on variety. Use a different activity each day of the week: Monday for Squish the Syllables. Tuesday for Read It Build It Write It, Wednesday for Swat the Sound, and so on. This keeps practice fresh and ensures your child builds a range of skills.
Match the activity to the skill level. A child who is still learning letter sounds needs different activities than one who is blending CVC words. Adapt each activity to your child’s current zone of development. When an activity feels too easy or too hard, adjust the word complexity rather than abandoning the activity.
Follow their lead. If your child resists an activity, switch to a different one or take a short break. The goal is to build positive associations with reading practice. A frustrated child is not learning effectively, no matter how good the activity is.
Think beyond the five activities. These five activities are a powerful starting point, but they are just the beginning of what structured multisensory reading instruction can offer. A complete program like the PRIDE Reading Program provides systematic, sequential multisensory lessons that build from letter sounds all the way to reading comprehension. For even more support, explore our reading comprehension strategies to help your child move from decoding words to understanding stories.
Frequently Asked Questions About Multisensory Reading Activities
What do I need to buy to start multisensory reading activities at home?
Almost nothing! Most multisensory reading activities use items you already have: a baking sheet or shallow tray. Sand or salt, index cards, a marker, letter tiles or magnetic letters, and a fly swatter. Simple magnetic letter sets are available for under $15 if you want a complete set.
How long should each multisensory reading session last?
Just 10 to 15 minutes per day is enough to see progress. Short, focused sessions are more effective than long, drawn-out practice. Consistency matters far more than duration.
Can multisensory activities help a child with dyslexia?
Yes. Multisensory reading instruction is a core component of the Orton-Gillingham approach. It was specifically designed for children with dyslexia. By engaging multiple senses simultaneously, these activities create alternative neural pathways for processing language.
At what age should I start multisensory reading activities?
Multisensory activities can begin as early as preschool (ages 3 to 4). Pre-reading skills like letter recognition, phonemic awareness, and rhyming are great starting points. They remain effective through elementary school and beyond.
What is the difference between multisensory reading and traditional phonics?
Traditional phonics relies on visual and auditory methods. Multisensory reading uses kinesthetic (movement) and tactile (touch) elements. These create additional memory pathways in the brain.
Ready to Try Multisensory Reading Activities With Your Child?
You do not need expensive materials or specialized training to bring multisensory reading activities into your home. All five activities in this article use items you already have on hand, and they take just minutes to set up. The key is consistency, not complexity.
If you are looking for a complete, structured reading program that builds on these very principles, the PRIDE Reading Program offers systematic Orton-Gillingham instruction designed for parents to use at home. Unlike traditional phonics programs, PRIDE weaves multisensory techniques into every single lesson, so your child is always learning through sight, sound, touch, and movement.
Browse our complete program to find the right starting point for your child.
Every child can learn to read. With the right approach and a few minutes each day, you can help your child discover that reading is not a struggle – it is an adventure.